In theory there is no difference between theory and practice. In practice there is. — Yogi Berra
Homelab Series Index
Digital freedom: creating a personal services ecosystem without depending on big tech.
From Theory to Practice Link to heading
After describing in the first article the motivation and hardware chosen for my homelab, it’s time to get our hands dirty. The HP 260 G4 has arrived, Proxmox VE has been installed, and now the fun begins: configuring everything properly.
Proxmox VE Installation Link to heading
The Proxmox installation was surprisingly simple. I downloaded the ISO from the official website, created a bootable USB, and followed the installation wizard.
In less than 15 minutes I had the operating system ready and the web interface accessible.
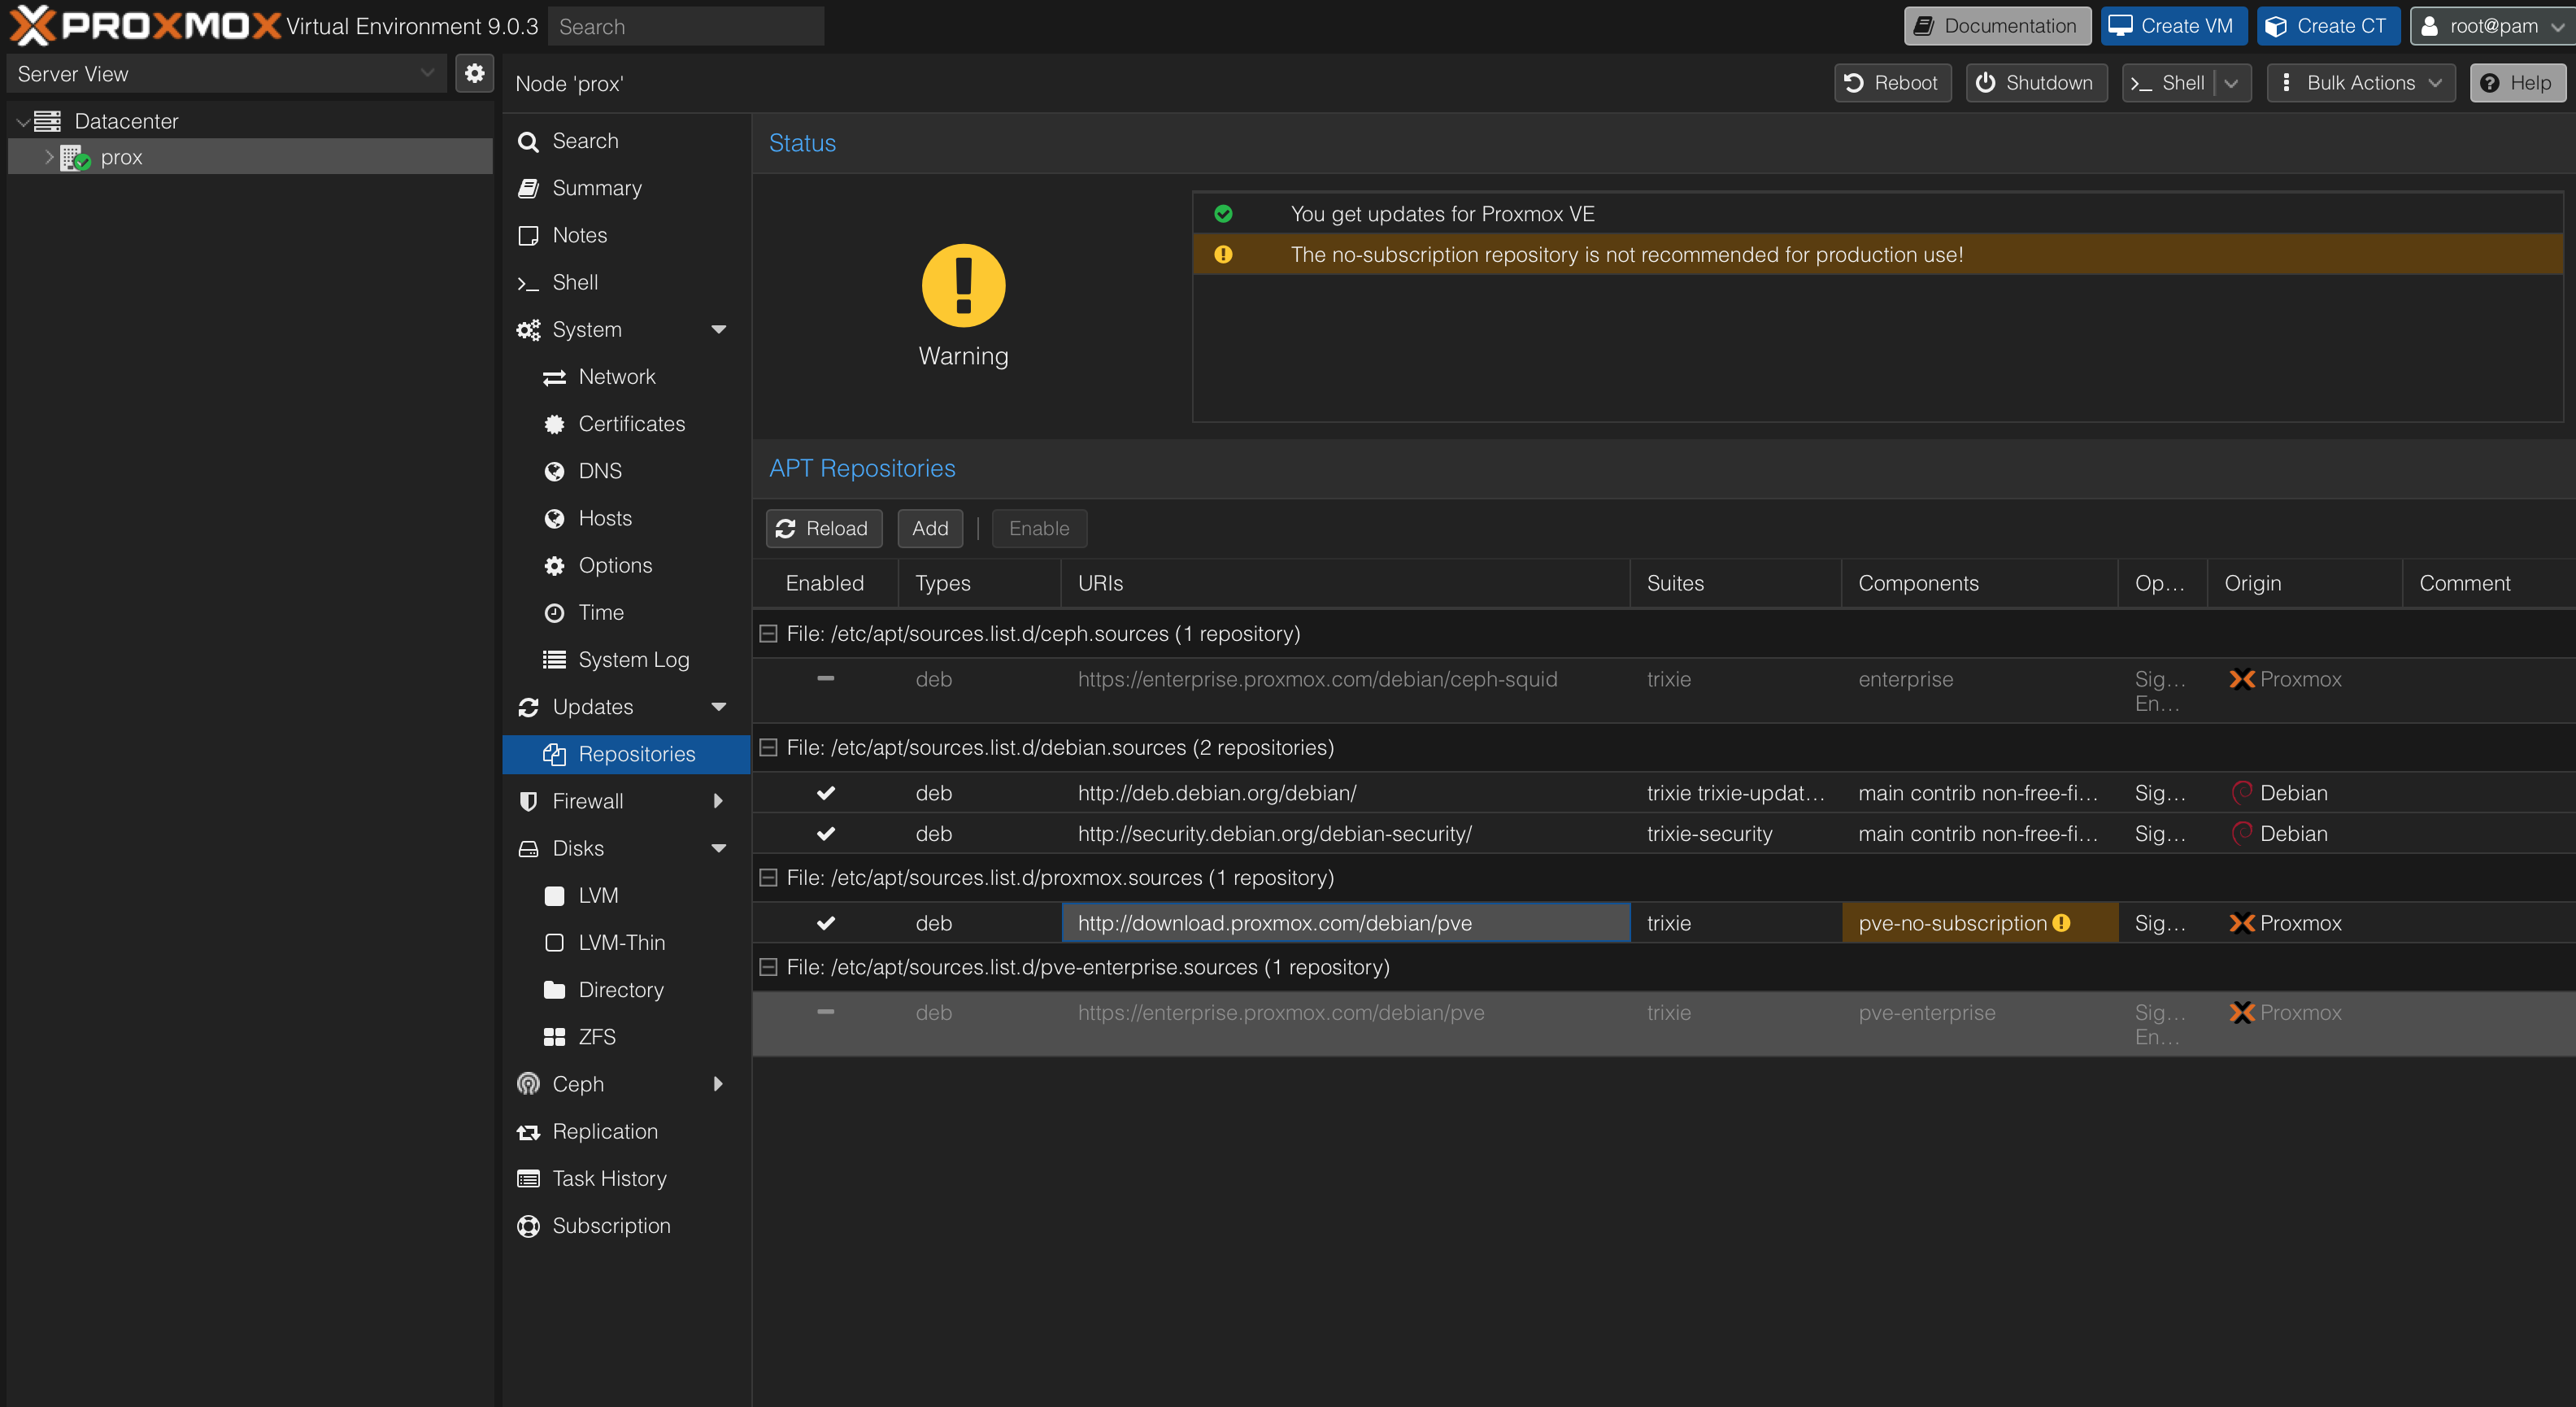
The Subscription Warning Link to heading
Once logged into the web interface, I immediately noticed the red message:
No panic, this is normal. Proxmox has two repositories:
- Enterprise Repository: Requires paid subscription, more stable for production environments
- No-Subscription Repository: Free, perfect for homelab and testing
To remove the warning and receive updates, just modify the repositories. You can do this via web interface (Node → Updates → Repositories) by disabling the enterprise one and adding the no-subscription one, or via console by modifying /etc/apt/sources.list.d/pve-enterprise.list.
Infrastructure Decisions Link to heading
Before proceeding with container creation, it’s important to define some fundamental architectural aspects that will influence the entire future setup: how to manage data storage, how to organize services in containers, and what approach to adopt to balance isolation and resource efficiency.
Storage Strategy: System and Data Separation Link to heading
One of the most important decisions in homelab architecture is how to manage storage. With the internal SSD of only 256GB and the forecast growth of data, I opted for a clear separation from the beginning by adding a dedicated external SSD.
This choice might seem premature - after all, with about 50GB of current photos, I would still have margin on the internal disk. But this is exactly the point: implementing the correct architecture before finding yourself with a full disk is a forward-thinking choice. Separating system and data from the start means never having to face forced migrations or complex reorganizations when space starts running low.
Independent backup control is another determining factor. Being able to snapshot only the data without involving the entire operating system greatly simplifies the backup and recovery strategy. And when the time comes to expand storage - because it will come - it will be a matter of replacing a single external disk rather than redesigning the entire architecture.
Directory Storage vs Bind Mount Points Link to heading
Initially I had evaluated Proxmox’s Directory Storage for its simplicity: you connect the disk, add it through the GUI, and all containers see it automatically. It’s the “zero configuration” approach that works well for those who want immediate results.
But the more I thought about it, the more I realized I was sacrificing control for convenience. With Directory Storage, Proxmox manages everything behind the scenes - great for productivity, less great for a homelab where the goal is also to learn. How do I debug if something goes wrong? How do I control granular permissions? How do I organize data for different services?
Bind Mount Points require some additional manual configuration, but offer exactly the control I was looking for. I can structure the data as I want on the host, give each container access only to the necessary directories, and maintain full visibility on what happens to the filesystem.
Practical Implementation Link to heading
The structure I planned is simple but flexible:
/mnt/external-ssd/
├── immich/
│   ├── photos/
│   └── database/
└── navidrome/
    └── music/
Each service has its dedicated area, I can make selective backups by category, and adding new services simply means creating a new directory. From a performance perspective it’s identical to Directory Storage - containers access the host filesystem directly without overhead.
The final architecture clearly separates roles: the internal SSD hosts Proxmox, LXC containers and Docker applications, while the external SSD focuses exclusively on persistent data. When Immich processes thousands of photos or when I add the music library, the system will remain responsive because the heavy data lives on the dedicated disk.
Container Philosophy: The Balance Between Isolation and Efficiency Link to heading
Another important architectural decision is container granularity: one service per container or multiple grouped services? It’s a question that goes beyond simple efficiency - it touches aspects of maintainability, debugging and backup strategy.
My first inclination was to create separate containers for each service. Total isolation is elegant: if Immich has problems, Navidrome continues undisturbed. Debug and updates become surgical operations that don’t risk compromising other services. And at the backup level, making granular snapshots of individual services is a luxury that greatly simplifies recovery.
Resource overhead must be considered: according to Proxmox documentation, an Ubuntu LXC container consumes about 50-100MB of RAM for the base OS. But we’re talking about negligible numbers on a 16GB system - for what I plan to do I’ll never even come close to saturating the RAM.
The Advantages of Total Isolation Link to heading
Despite the overhead, single containers offer concrete advantages:
- Fault isolation: An Immich crash doesn’t touch Navidrome at all
- Dedicated resources: I can allocate 6GB to Immich and 2GB to Navidrome without conflicts
- Granular backups: Immich snapshots without involving other services
- Safe updates: Testing new versions in complete isolation
- Portability: Migrating a service means moving a single container
The Decision: Separate Containers Link to heading
Given all the advantages of isolation and the irrelevance of RAM overhead for my use case, I maintain one container per service. Total isolation, granular backups, and debugging simplicity far outweigh any theoretical consideration about resource efficiency.
First LXC Container Link to heading
With the architectural decisions defined, I can proceed to create the first container to test the entire configuration. I created an LXC container with Ubuntu to host Docker and verify integration with external storage:
- Template: Ubuntu 22.04 LTS
- RAM: 4 GB
- Swap: 1 GB
- Storage: 10 GB on internal SSD
- CPU: 4 cores
The container started in a few seconds - one of the magic aspects of LXC compared to traditional VMs. Resources are still expandable at any time through Proxmox’s web interface.
Docker Installation Link to heading
Once inside the Ubuntu container, I installed Docker using the official command that downloads the official installation script based on your machine, and configures everything automatically:
curl -fsSL https://get.docker.com | sudo sh
Testing and Verification Link to heading
This test container allows me to verify that the entire ecosystem works correctly: Docker starts without problems, access to external storage via bind mount is operational, and performance is in line with expectations before proceeding with the deployment of definitive services.
Next Steps Link to heading
With Proxmox configured, the first LXC container operational and external storage ready, the homelab foundation is solid. It’s time to deploy the first real service.
→ Continue with: Homelab: Deploy Immich and Photo Management where we’ll install and configure Immich